
Installation Guides / Decision Guide
Smart Lock Door Photo Checklist
Good photos let a supplier see relationships that isolated dimensions miss. Capture the door as a system, then add close-ups with clear labels.
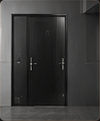
Full entrance from inside and outside with door closed
Front and rear views of the existing lock and handle
Door edge showing faceplate, latch, bolts and screw positions
Frame and keeper area with the door open and closed
Decision Context
What This Guide Helps You Confirm
A useful photo set starts wide and moves closer. The full entrance shows the door, frame, hinges, shelter and surrounding constraints; close-ups then explain the lock position and dimensions.
Keep each image sharp, upright and well lit. Place a ruler in the same plane as the measured feature and avoid screenshots that remove the original resolution.
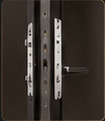
The image slot is reserved for product structure, door condition, material, installation, OEM or quality evidence related to this guide.
Evidence Workbench
Connect the Written Checklist to the Real Product or Door
Use the selected model, representative door and available documents together. Avoid treating a generic image, one feature name or one test value as a complete purchasing decision.
- Keep the candidate model and configuration visible.
- Use labeled photos or drawings instead of loose descriptions.
- Record uncertain items for confirmation before quotation.
- Retain the approved evidence for sample and production review.
Decision Table
Required Photo Set
Use the table to compare options on the same physical, operational and evidence basis.
| Photo | What it should show | Why it matters | Tip |
|---|---|---|---|
| Full entrance | Door, frame, hinges, wall and shelter. | Reveals application and installation constraints. | Step back and keep the whole opening visible. |
| Lock close-up | Panels, handle, cylinder and nearby holes. | Shows replacement coverage and hardware condition. | Photograph both sides straight on. |
| Door edge | Mortise faceplate, latch and bolt positions. | Supports lock-body comparison. | Open the door and focus on the edge. |
| Frame/keeper | Strike plate, gap, seals and alignment. | Identifies latch engagement and movement risk. | Include one closed-door reference image. |
Buyer Process
Capture Photos Suppliers Can Use
Move from site or project evidence to a documented model and supply decision.
Remove temporary objects that hide the lock, edge or frame.
Show the complete entrance and outdoor conditions first.
Photograph panels, door edge, keeper, hinges and visible holes.
Show thickness, backset and key dimensions with labels.
Use simple filenames such as outside, inside, edge, frame and dimensions.
Evidence Boundaries
What This Guide Should Not Be Used to Assume
These cautions keep material, technology, installation and report language tied to the selected model and real site.
Photograph measurements straight on and keep the ruler aligned with the surface.
Rear-panel clearance, battery access and gate exposure may differ from the exterior.
Remove addresses, access codes and personal information before sharing.
Related Routes
Continue the Decision With the Next Useful Page
Use related guides, product pages and support routes to close the remaining questions.
Buyer FAQ
Questions Buyers Ask Before Confirmation
Answers stay cautious where model, market, door or final configuration can change the result.
How many door photos should I send?
Usually six to ten clear images are enough when they cover the full entrance, both lock sides, door edge, frame, measurements and exposure.
Can I send a video?
A short video can help show gate movement or alignment, but still include sharp photos for measurement review.
Should I remove the existing lock?
Only if authorized and safe. Photograph before removal and restore security afterward.
Ready to Confirm?
Show the complete door before asking for a model.
Send the ordered photo set with measurements and required functions. SivoLock can identify the remaining compatibility questions.
Buyer action block
Convert Smart Lock Door Photo Checklist into a usable inquiry note.
Use this article to prepare a concrete next step: copy the relevant facts into an RFQ, attach evidence and ask for selected-model confirmation.
Include application, door data, model preference, quantity, market and the exact document or evidence requested.
Door photos, measurements, drawings, sample records and artwork files reduce back-and-forth.
If the article mentions a report, certification, IP rating or test, request availability for the exact SKU.
| Decision area | Confirm before quotation | Claim boundary |
|---|---|---|
| Inquiry line | We are reviewing Smart Lock Door Photo Checklist; please confirm the suitable SivoLock model route. | Turns the article topic into a sales-ready question. |
| Required inputs | Door/application details, target market, quantity, sample timing and preferred functions. | Makes the response practical rather than generic. |
| Evidence request | Datasheet, installation guide, report availability, sample photos or approval files as relevant. | Ties documents to the selected model. |
| Next page | Continue to product, material, support or contact pages after the open questions are listed. | Improves internal navigation without forcing a false answer. |
Can this page replace a final datasheet?
No. Use it to prepare the buying conversation, then confirm selected-model values, reports and packaging details from the latest SivoLock response.
What happens when a value is not available yet?
Leave it open and mark it as configuration-dependent. Do not turn missing certification, IP, factory or test evidence into a public claim.
Send the confirmed inputs and keep any missing proof as an open request. SivoLock can respond with model-specific options, document availability and quotation questions.